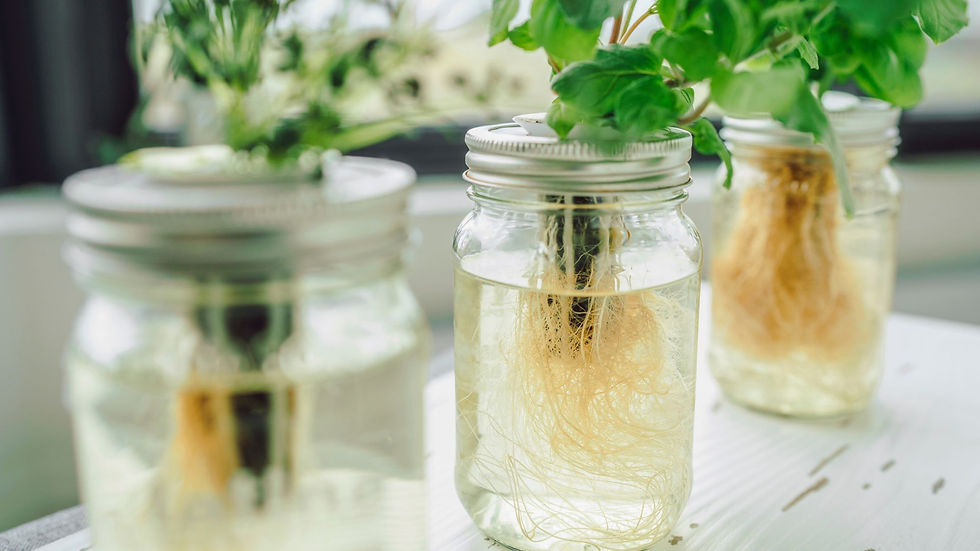
You will like this post if you have ever propagated a plant in a glass jar next to your kitchen window!

The method is named after Dr. Kratky, who introduced this technique in the late 1990s and early 2000s. Dr. Kratky was a researcher at the University of Hawaii, where he worked extensively on developing low-tech and efficient agricultural solutions for growing food.
Dr. Kratky's research focused on finding a method that could be used in resource-limited environments, where traditional soil farming or more complex hydroponic systems might not be feasible.
Publication and Adoption: The method gained popularity after Dr. Kratky published his findings and demonstrated the effectiveness of this low-maintenance hydroponic system. Since then, it has been widely adopted by hobbyists, educators, and small-scale farmers worldwide.
The Kratky method remains an innovative and practical solution for growing plants hydroponically, particularly in settings where simplicity and low maintenance are key considerations.
How Kratky Method Works
Container and Nutrient Solution: Plants are grown in a container filled with a nutrient solution that provides all the essential minerals and nutrients needed for plant growth. The container can be a plastic tub, a glass jar, bucket, or any watertight container.
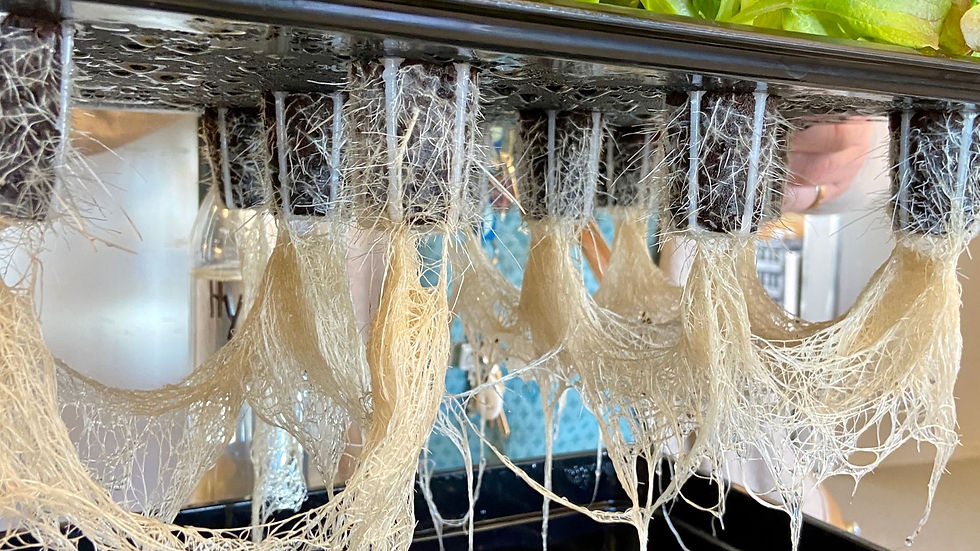
Plant Support: Plants are placed in net pots or cups, with their roots partially submerged in the nutrient solution. The net pots are often filled with a growing medium like clay pebbles, rock wool, or perlite to support the plants.
Air Gap: As the plants consume the nutrient solution and water evaporates, the water level in the container drops. An air gap forms between the bottom of the net pot and the nutrient solution, allowing the roots to access both air and water. This air gap provides oxygen to the roots, which is crucial for plant health.

Refilling: Unlike other hydroponic systems, the Kratky method typically does not require continuous replenishment of the nutrient solution. The initial amount of nutrient solution is calculated to last until the plant is ready to harvest. In some cases, the solution might need to be topped up if the water level drops too quickly.
Pros & Cons of Kratky Method
Advantages
Simplicity: The Kratky method is easy to set up and requires minimal maintenance.
No Electricity Needed: Since it is a passive system, there are no pumps or electrical components.
Cost-Effective: Low initial setup cost and minimal ongoing expenses.
Scalability: Suitable for small-scale home gardens as well as larger operations.
Disadvantages
Limited to Small to Medium-Sized Plants: Best suited for leafy greens and herbs; not ideal for large fruiting plants.
Preventing Root Rot: If the air gap is not maintained properly, roots can suffer from lack of oxygen.oşluğu uygun şekilde korunmazsa kökler oksijen eksikliğinden muzdarip olabilir.
Tips For Success
Choose Smaller Varieties: While some fruiting plants can be grown using the Kratky method, it’s generally best to stick to smaller varieties that do not require extensive root systems or heavy nutrient uptake. Herbs like: basil, mint, cilantro, parsley thyme, oregano and chives; leafy greens like: lettuce, kale, arugula; or smaller fruiting plants like: cherry tomatoes, chili peppers etc.
Monitor Water Levels: Even though the Kratky method is low-maintenance, keeping an eye on water levels and nutrient concentration can help ensure optimal growth.
Temperature and Light: Ensure that the plants receive adequate light (natural or artificial) and maintain a suitable temperature range for the specific plants being grown.
Air Flow: Good air circulation can help prevent mold and mildew, especially in leafy greens and herbs.
Prevention of Algae: If the container used is transparent, it is recommended to cover it with a material that blocks light to prevent algae formation.
By selecting the right plants and maintaining proper conditions, the Kratky method can yield excellent results with minimal effort.
Opmerkingen